Monday, March 21, 2011

Trick to post Code-Snippets in your Blog

From last Few days, I was searching for a solution to post code, properly designed- obviously for free blogs. Because, currently its a headache to post code in blog as-it-is I want to post. Found some nice tricks. But, some of them needs registered blog-site[ should have FTP-Access, to upload files].
Also, got some template editing tricks, but they were not much good. So, i edited some css snippets, which is now working nicely [ that is currently used in this blog-post].
There are 4 steps to follow-

1.
Enter in your Blog admin and go to Design >> Edit HTML a

2.
Come to the end-of-head-section
OR
Simply search(ctrl+F) for this code ""

Now our new code will go here -
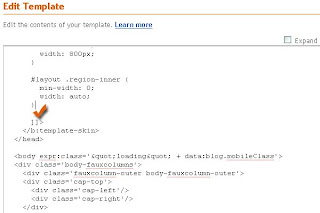


3.
Now paste the below code here-


pre, code
{
background:#efefef;
border:1px solid #A6B0BF;
font-size:100%;
line-height:130%;
overflow:auto;
padding:5px;
color:#000000 }
pre:hover {
border:1px solid #efefef;
}

.clear { clear:both;
overflow:hidden;
}
pre .comment_in_code, code .comment_in_code
{
color:#999999;
}

and then Save your changes.

4.
Now, write a blog-post with code-snippets
Then parse it using-
http://www.blogcrowds.com/resources/parse_html.php
OR
http://www.elliotswan.com/postable/

Then, find and wrap your codes such that->
<pre> Your Post Code Snippet Here </pre>
Or
<code> Your Post Code Snippet Here</code>

And your comments within the Code goes here-
<span class="comment_in_code"> //This is a comment within the code snippet. </span>


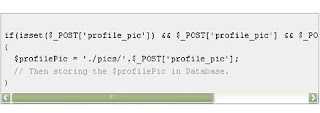
- and thats all. The code-snippets and comments will look like-
Friday, March 11, 2011

treating a BLANK SPACE in REGULAR EXPRESSION

Got a problem while allowing a blank space in regular Expression, for service URL.

-> so the solution is-
"S" (an uppercase 'S')

So at last my regex pattern was like this in php-


[a-z:A-Z;=;\\S]+/[0-9]+
//Now it will allow case-insensitive any alphabet, any number

UPLOADIFY - problem while SETTING SESSION/ COOKIE - Alternate solution

Today I got a weird problem with UPLOADIFY while setting a cookie/ session with uploaded filename with current timestamp; from AJAXed uploadify.php.
I was trying to set that from uploadify.php so that I could get the filename to formSubmit.php.
but it was not working as there used to be a flash player issue (the flash player access the uploadify script as a new user and gets a new session).

So, what I did is-

1.
in form.php (also contains javascript)-


<?php
// setting a variable with current timestamp, to rename a file.
[it will not affect on .gif/.png images]

$uploadedImg = time().'.jpg';
?>

<script type="text/javascript">
$(document).ready(function() {
$('#file_upload').uploadify({
'uploader' : './uploadify/uploadify.swf',
'script' : './uploadify/uploadify.php',
'cancelImg' : './uploadify/cancel.png',
'folder' : './pics',
'auto' : true,
'scriptData' : {'imgName': '<?=$uploadedImg?>'},
'buttonText': 'Select Logo',

'onAllComplete' : function(event,data) {
$('#profile_pic_flag').val(1);
}
});
});
</script>


<form method="POST" action="formSubmit.php">

<!-- UPLOADIFY input element -->
<input id="file_upload" name="file_upload" type="file" />


<!-- input element to get the Picture name-->
<input type="hidden" name="profile_pic" id="profile_pic" value="<?=$uploadedImg?>" />

<!-- input element to Check if an imege is
uploaded or not(value set by UPLOADIFY onAllComplete event),
[this element is more efficient while Editing forms]-->

<input type="hidden" name="profile_pic_flag" id="profile_pic_flag" value="0" />

</form>


2.
in AJAXed uploadify.php

replace this part-


$tempFile = $_FILES['Filedata']['tmp_name'];
$targetPath = $_SERVER['DOCUMENT_ROOT'] . $_REQUEST['folder'] . '/';
$upFileName = $_REQUEST['imgName'];
$targetFile = str_replace('//','/',$targetPath) . $upFileName;

// uploading the file with the 'imgName', which was set by form.php
// and picture uploaded easily


3.
in formSubmit.php


if(isset($_POST['profile_pic']) && $_POST['profile_pic'] && $_POST['profile_pic_flag'] )
{
$profilePic = './pics/'.$_POST['profile_pic'];
// Then storing the $profilePic in Database.
}


- And all are done.